

Hunting, Trapping & Fishing
Interactive Map Viewer
Updated 08/2017
Contents
Part 1: Overview of the Map Viewer
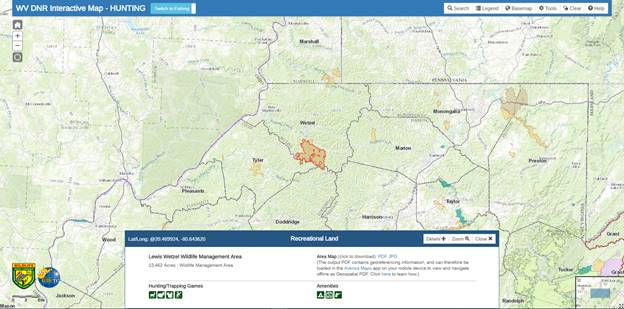
The figure above shows the layout of the Hunting, Trapping and Fishing application. It has the following main components:
- 1. Header
- 2. Map Area
- 3. Menu Panel
- 4. Footer - Basic Information Panel
- 5. Detail Information Panel
- 6. Navigation Tools
- 7. Overview Map
- 8. Scale Bar
The Map Area displays all the map layers as well as graphics made by user selection, search and other map tools. It interacts with almost all other components listed. This help document will mainly focus on the following major components: Header, Menu Panel, Basic and Detail Information Panel.
↑ Back to TopPart 2: Header
The header is located at the top of the application page.

2.1 Title
The title of the application also serves as a hyperlink to the path of the application, which allows the user to refresh the page.
2.2 View Switch
Right next to the application title, there is a pair of buttons that allows the user to switch between Hunting and Fishing Views. When one of the buttons is selected, it will be highlighted, and the other will automatically be deselected.
2.3 Menu Buttons
On the right of the Header, there are a total of six buttons. Except for the Clear button, clicking on each of them makes the Menu Panel appear on the upper-right side of the screen.
↑ Back to TopPart 3: Footer, Information Panels & Popup Window
3.1 Footer
A footer is displayed when the user moves the mouse around the map extent. It displays the coordinates based on the movement of mouse. If the user click on the map and no feature was identified, the coordinates of the clicked location will be captured in the footer, following the dynamic coordinates display.

3.2 Basic Information Panel
The Basic Information Panel will show up to replace the Footer once one of the identifiable features (including Recreational Lands in Hunting View, Stocked Trout Streams, Access Sites and Fishing Lakes in Fishing View).
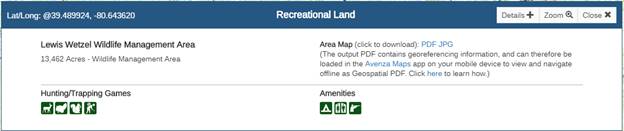
The panel has a header that has the same styling as the original Footer. The DNR name of the feature clicked, plus the coordinates of the site (or centroid of stream/land/lake) will be displayed. It also has three buttons on the right: Details, Zoom and Close.
Clicking on the Details button will expand/fold the Details Information Panel (see 3.3 for details); Clicking on the Zoom button will reset the map viewer scale to display the full extent of the site; Clicking on the Close button will close the information panel and replace with the footer.
| View | Feature Type | Information displayed |
|---|---|---|
| Hunting | Recreational Lands |
|
| State Parks |
|
|
| Other Federal Lands |
|
|
| Fishing | Fishing Lakes |
|
| Access Sites |
|
|
| Trout Streams |
|
3.3 Detail Information Panel
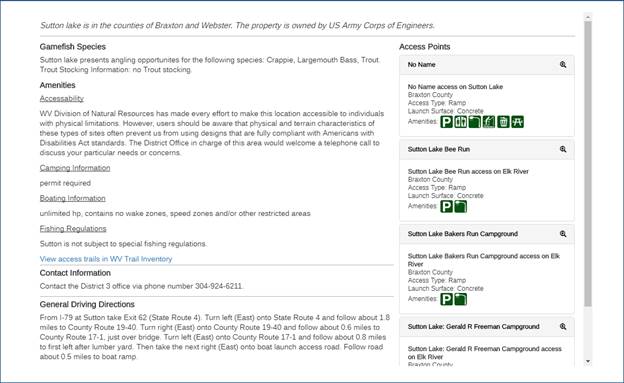
The Detail Information Panel will be expanded under the Basic Information Panel once the user clicks on the details button, and will take all the height of the browser window together with the Basic Information Panel. The Map section will also be dimmed to create a visual effect of being underneath the information panels. It will be folded once the user clicks on the fold button, and the Basic Information Panel will be reset to the bottom of the browser window. If the user clicks on the close button while the Details Information Panel is visible, both panels will be closed.
| View | Feature Type | Information displayed |
|---|---|---|
| Hunting | Recreational Lands |
|
| Fishing | Fishing Lakes |
|
| Access Sites |
|
|
| Trout Streams |
|
3.4 Pop-up Window
A Pop-up Window will be displayed when clicking on a feature from several hunting/fishing resources layers. The table below shows the types of information included in the Pop-up Window for each feature type in both views. In addition, every pop-up window contains a link to view the feature location in Google Maps.
| View | Feature Type | Information displayed |
|---|---|---|
| Hunting | License Agents | Name, Address, Phone number, More info link |
| Hunters Helping the Hungry Processors | Name, Point of contact, Address, Phone number, About program link | |
| Shooting Ranges | Name, County, Benches, Distance, Restrooms, Rules link | |
| Access Points | Name, Access Type, WMA of access | |
| Fishing | License Agents | Name, Address, Phone number, More info link |
| Warm Water Area | Name, Special Regulations | |
| Float Trips | Name, Counties, Details (direction, distance, species) |
Part 4: Menu Panels
4.1 Search
The Search Panel has two main sections: Search Options and Search Results. The Search Options section contains two ways of search: search by keyword and search by filters. After setting desired filter options in the Options section, search can be conducted by clicking the Apply button, and the panel will be switched to the Results section. If no filter option was set, a warning window will show up, suggesting that the user set at least one filter option.
4.1.1 Search by keyword
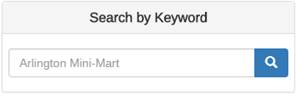
This search option allows the user to search for any type of hunting/fishing resources by a keyword. Known as “Fuzzy Search”, while the system doesn’t require the input keyword to be complete, it does require it to be spelt correctly and in the right order. For example, the input “Arlington Mini” will get a returned result of “Arlington Mini-Mart”, while the input “Arlington Mart” will not get any returned result.
4.1.2 Search by filters
This search option provides three sets of filters that allow the user to search for hunting or fishing resources with matching location/area, hunting/fishing species, and/or amenities.
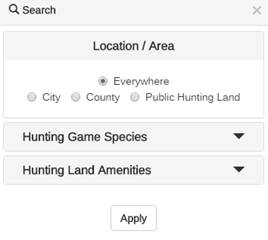
Location
The first filter section is for selecting a location. There are three radio options: County, City and Public Hunting Land. Once an option is selected, a corresponding drop-down menu will show up below, allowing the user to choose from one of the locations/areas listed. After hitting the Apply button, the map will be zoomed to that specific extent, and a graphic layer showing the selected area’s name and extent will be added to the map viewer. A extended buffer area with 10-mile radius will be applied for a city / hunting land / fishing area search. If a location filter is not desired, the user can simply leave the Everywhere option selected.
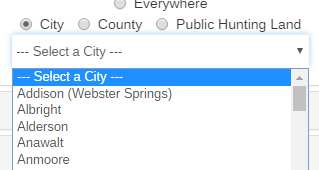
Species
This filter section allows the user to check one or more species from a list of hunting or fishing species. After clicking the Apply button, the system will return all the hunting lands / fishing lakes that contains AT LEAST ONE of the checked species, plus other filters defined.
Amenities
This filter section allows the user to check one or more amenities from a list of hunting or fishing site amenities. After clicking the Apply button, the system will return all the hunting lands / fishing lakes that contains ALL the checked amenities, plus other filters defined.
When only the location/area filter is set, the search will be performed on the following layers:
- Hunting View: Recreational Lands
- Fishing View: Fishing Lakes, Access Sites, Stocked Trout Streams
When a species or amenities filter is selected, the search will be performed only on Recreational Lands for Hunting View, and Fishing Lakes for Fishing View.
4.1.3 Search Results
The Search Results section will be displayed when the user clicks the Apply button after setting at least one filter option. It contains the following parts:
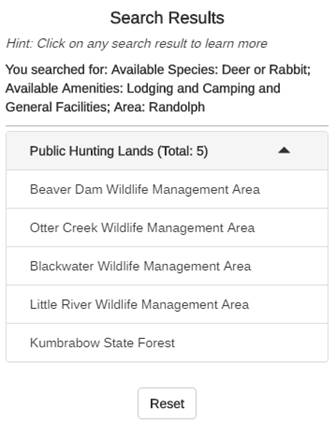
Search Criteria: Criteria based on the filter options set by the user.
List of Search Result Features: Names of the returned features. When clicked on any record, the map will be zoomed to that feature, and the Basic Information Window will be displayed. When the results contain multiple feature types, they will be grouped as separate panels.
Reset Button: Clicking the button will reset the Search criteria, erase the searched location graphics (if available) and switch the Search menu panel back to the Search Options section.
4.2 Legend
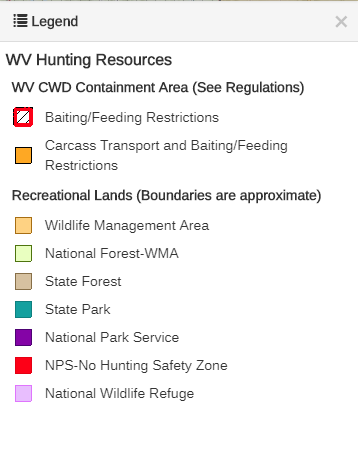
The Menu Panel for Legend displays the symbology information for all layers visible in the current Map Viewer. It changes as the layers’ visibility change when the user zooms in or zooms out. The title of the legend will change when the user switches between Hunting and Fishing views. For layers including Recreational Lands and Trout Streams, different symbology was defined based on categorical attributes. For layers including Recreational Lands and Public Fishing Lakes, different symbology was defined based on the zoom levels for better visibility.
4.3 Basemap
By clicking the Basemap button, the menu panel will show up with the list of basemap layers that are available to view. Ten background map layers from a variety of sources, including ESRI, WV DEP and WV GISTC, are included in this application. The default basemap to be displayed is ESRI Topography.
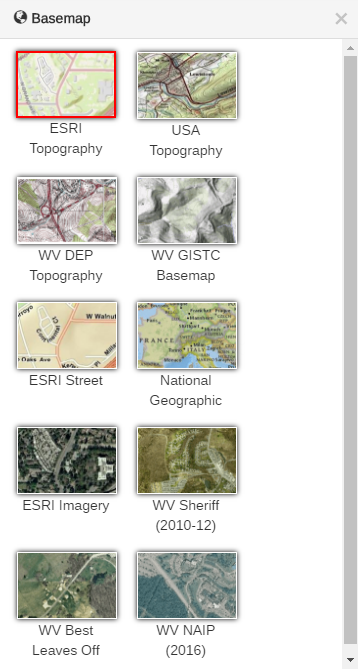
Some basemap layers (e.g. USA Topography, National Geographic) have limited zoom levels available. When zoomed outside the range of selected basemap, the basemap will be automatically switched to high-resolution statewide aerial imagery. When zoomed back within its range, the basemap will automatically be switch back.
4.4 Tools
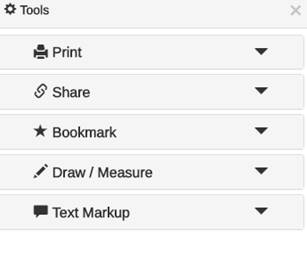
The Tools menu panel contains five sub panels for five utility map tools for the user. Click on any of the header to expand the panel for that tool.
4.4.1 Print tool
The Print tool allows the user to print the current map extent as a PDF file.
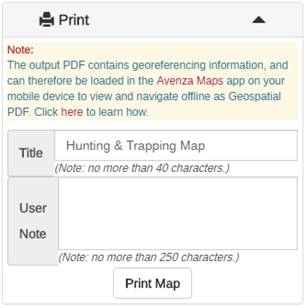
The Print tool allows the user to set map title and add user note to the output map. When the “Print Map” button is clicked, it will be disabled and the printing service will start, and the link to output map will be generated once completed. By clicking on “Print Map” again, a new output will be generated.
The output map contains all the essential map elements and useful information such as date created, north arrow, scale bar, reference system, and legends for hunting/fishing resources layers.
The output PDF contains georeferencing information, and can therefore be loaded in the Avenza Maps (http://www.avenza.com/avenza-maps) on your mobile device to view and navigate offline as Geospatial PDF.
4.4.2 Share tool
The Share tool allows the user to generate a URL link with information of certain map extent and map view to share to other people.
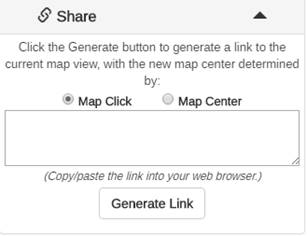
There are two options for generating a map link: using latest map click as the shared map center, or using current map center as the shared map center. After clicking the “Generate Link” button, a link will be generated in the text area, and the user can copy that link to share with others. Please note that share tool only shares the current map extent. All other information, including the layers displayed and temporary graphics, will not be included in the shared link.
4.4.3 Bookmark tool
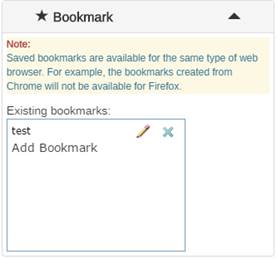
When the “Add Bookmark” button is clicked, a new bookmark will be added to the “Existing bookmarks” section, which stores the map extent information at the time it was created. By clicking on an existing bookmark, the map will be reset to that stored extent. The next newly created bookmark will be added to the bottom of the bookmark list. Besides adding new bookmarks, the user is also able to delete a previous bookmark or edit the name of an existing bookmark.
4.4.4 Draw / Measure tool
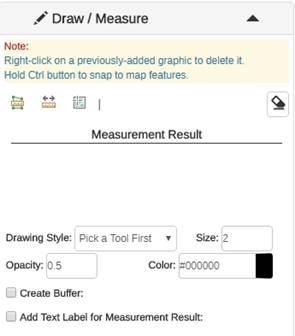
The tool window consists of three parts: The top for different draw and measure options, the middle for measurement result display, and the bottom for customizing your drawings, with options including style, size/line width, opacity and color, plus options to create buffer and text label.
The user can select from three different options on the top of the window to active the measure and draw tool, plus an Erase button to erase all drawings:
- Area (polygon): Click on the map to draw a polygon. Once finished (double click), the area is displayed.
- Distance (polyline): Click on the map to draw a polyline. Once finished, total length is displayed.
- Location (point): Click on the map to draw a point. Latitude and longitude are displayed.
The user can delete a previously-added graphic by right-clicking on the target graphic. To snap to features on the map, the user can hold the Ctrl key while drawing.
4.4.5 Text Markup tool
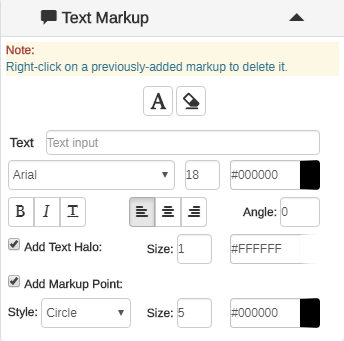
Once the window opens, the user can click on the Add Text button to activate the tool. The user can choose to add markup text, point or both to the map by clicking anywhere on the map viewer. There are also plenty of customization options to set size, font, color, halo, style to the text or markup point.
4.5 Clear
By clicking the Clear button, all temporary graphics that are shown on the map viewer, including search results, drawings and markups, will all be erased. The Search and Tools menu will also be reset.
4.6 About
The menu panel after clicking the About button will contain texts and links to important information about this application, including help document, helpful resources links, disclaimer, contact information, etc.
↑ Back to TopPart 5: Navigation components
The navigation components, located on the upper-left corner of the map viewer, provides capabilities for users to easily pan around the map. There are 3 elements available for the following functions respectively: zoom to full extent, zoom in/out and zoom to current location.
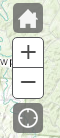
5. 1 Zoom to full extent
By clicking the Zoom to full extent button, the map area will be zoomed back to the pre-defined scale level (1:2311162), which shows the full extent of West Virginia.
5. 2 Zoom in / out
By clicking the Zoom in or Zoom out button, the user can zoom in/out in the map extent for one level. The 13 predefined scale levels for SHPO Map Viewer are listed below:
- 1: 2311162
- 1: 1155581
- 1: 577790
- 1: 288895
- 1: 144447
- 1: 72223
- 1: 36111
- 1: 18055
- 1: 9027
- 1: 4513
- 1: 2256
- 1: 1128
- 1: 564
5. 3 Zoom to current location
By clicking the Zoom to current location button, the map will be zoomed in to the user’s current location. Please note that when using this function, most browsers will ask for user’s permission before executing the geolocator. In addition, some browsers, including Google Chrome, currently doesn’t support this function.
↑ Back to TopPart 6: Overview Map
The figure below shows the overview map, located at the bottom-right corner of the map area. It is used to locate the current map view within a wider extent. There is a blue rectangle box within the overview map that represents the current map view extent. The user can drag and move around the box, and the main map area will change to the updated extent accordingly.
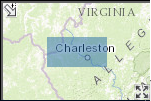
By clicking the white arrow at top-left corner, the overview map can be minimized. The overview map can be restored by clicking that arrow again. By clicking the black expand arrow at bottom-right corner, the overview map will be expanded to cover the whole map area.
↑ Back to Top